Welcome to Week 2 of the Goldie Quilt SAL! Last week we talked about the parts of the Goldie Quilt, suggestions on picking a color palette and I provided tons of mock ups for inspiration!
This week we are going to be cutting out all of our fabric and mix + matching our pieces into block piles. This is one of my favorite parts!
POST TO INSTAGRAM
Week 2: Post a photo of your cut fabrics or your block piles to show your progress! Be sure to use the#goldiesal hashtag to be entered into this week's giveaway.
You must post by Thursday February 9th at 11:59pm PST to be entered into the Week 2 giveaway. Each week starts fresh on Fridays and the previous weeks post won't count for the next week's prize.
The weekly prizes will be the same throughout the SAL. One person will win the opportunity to get a 15 piece FQ bundle from me! You will be contacted when you win and then you get to let me know the color palette you are interested in - all blues, neutrals, rainbow, etc. And I will take your idea and build you a bundle! You get to also tell me if you want all solids, all prints or a mix. I can't wait to specially curate a new bundle each week! And yes, this is open to international participants.
BEFORE WE CUT
Before we get into cutting there are a few tips and suggestions to note.
Right after we released the Goldie Quilt Pattern, we noticed an error in the cutting section. We updated it right away but be sure that under the Throw and Queen size Set 2 instructions it says (2) 1 1/2" x 19 1/2" strips. The visuals in the diagrams are correct but the number was wrong originally. If you bought the PDF, it is most likely fixed and if you bought a printed pattern, we started adding little stickers for the correct number. Again, the visuals are correct, just a typo in the actual numbered instructions.
Before you start cutting your FQs, be sure that they are truly 18" x 21". There is very little room for error with needing at least 17.5" on the 18" side and 19.5" on the 21" side of the FQ. Be very mindful when squaring up a FQ too that you don't trim too much off.
I would suggest starting with a fresh rotary blade to get the smoothest and most accurate cuts.
If you feel confident, you can stack 2 - 3 FQs at a time and cut through multiple layers.
In the Throw Size, you need to decide which 9 FQs will be part of Set 1 cuts and which 9 FQs will be part of Set 2 cuts. The only difference between the Sets, is Set 1 includes an extra HST cut. So any fabrics you put in Set 1 will have double the amount of HSTs in the final quilt.
Be sure to press out your FQs to get rid of deep wrinkles from folding. Also, using starch is a great idea in this quilt make because we have lots of smaller pieces and cuts and it will help them keep their shape better while we handle them.
AS WE CUT
Now that our fabrics are pressed, let's cut our fabrics! Here are a few of my tips and suggestions:
First, go ahead and cut your Cornerstone 9 Patch strips. You can get what you need out of F8s, FQs or yardage. Keep these together for future sewing.
For background fabric, if you are using F8s, be sure to keep like fabrics with like fabrics. A single F8 will give you the cuts needed for 1 block pile. If using yardage, you will separate your total pieces into (3) larger squares and (4) smaller squares per block pile.
When cutting, stay organized by piling all of your cut pieces from a single FQ into an organized pile. This will help you keep track of each FQ and make it easier to see if you missed a cut or if you got everything you needed out of the FQ.
Once all of the FQs are cut and stacked into their own FQ piles, we will move onto organizing them for making block piles.
ORGANIZE + MAKE YOUR BLOCK PILES
Before I make my block piles, I like to now organize all of the cut pieces into like piles. So all the HST cuts go together, all the 9 patch strips go together, all the short sashing strips, and long sashing strips. Once that is done, then we create our block piles from these stacks.
The reason I do this is because it makes it easier for me to see what colors I have in each section for when I am mixing + matching. You don't have to do this extra step but it is helpful for me to visualize the fabric this way. The two sections of fabric you don't need for making the block piles are the Cornerstone 9 Patch strips and the long strip sashing pieces. You can set those aside.
As a note, in the pattern, I have sewing the Cornerstone 9 Patches happening first before organizing block piles but for the sake of the SAL, we are skipping that part until Week 3.
In the Goldie Pattern, under "Organize Your Blocks" you will see what each block pile requires. Each block you will have cut pieces for the HSTs, the Large 9 Patches and the Short Sashing Strips.
TIPS AND SUGGESTIONS FOR MIXING + MATCHING
My general rule of thumb for the Goldie Quilt mixing and matching is:
Large 9 Patches
1. Pair some LIKE colors together - light teal with a minty green and a bright blue with a similar blue. These similar pairings create a soft spot in the quilt because they create low contrast.
2. Do the opposite as well. Pair up contrast colors like the light white fabric and a deeper blueand ateal with a bright blue. These create the punch needed with high contrast.
The back and forth of high and low contrast make for a scrappy and playful quilt - my favorite!
HSTs
3. When deciding on which 3 fabrics to pick for the HSTs for each block, I like having them be a soft gradient in the simplest way of light to dark and dark to light. It helps create visual movement in the Bear Paw section of the block.
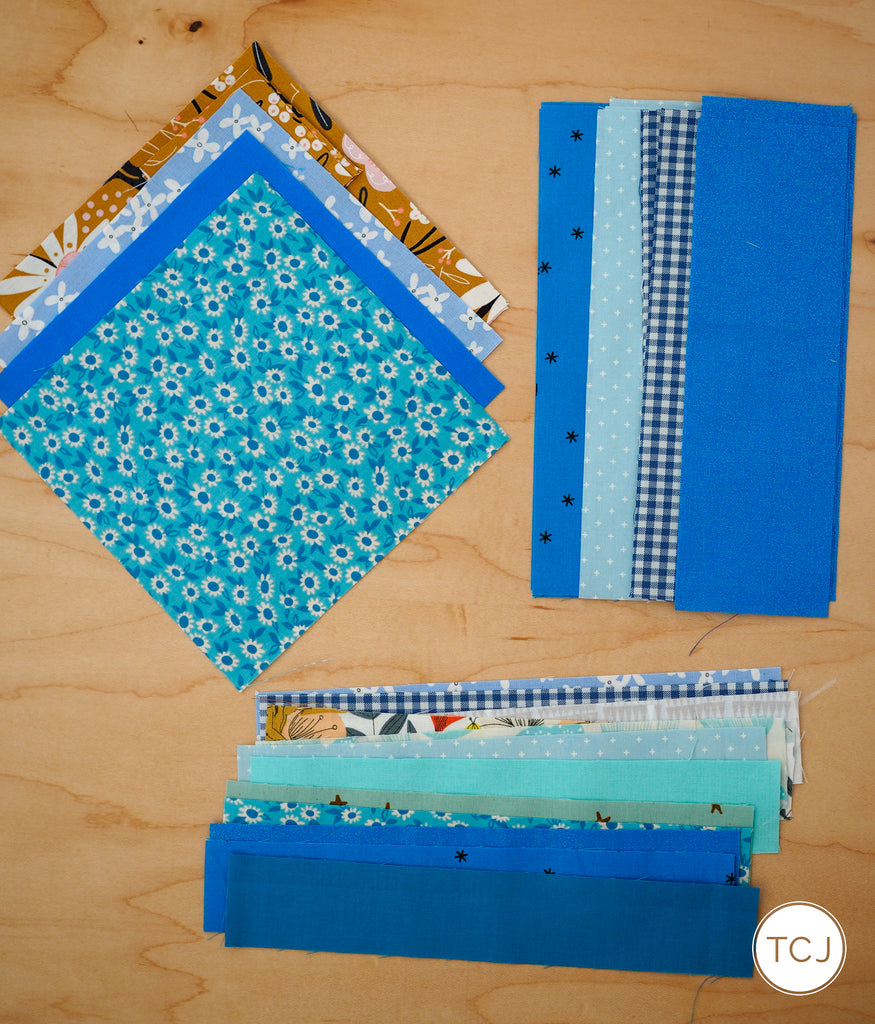
My piles may look a little crazy but the HST squares are on the bottom, then the Large 9 Patch strips and then the small sashing strips on top.
Here is one block separated out into its sections:
Remember, each block will get a completed Cornerstone 9 Patch when we get into Week 3.
Here are a few examples of high contrast and low contrast Large 9 Patch cuts:
I can't wait to see how you guys pair up all of your fabrics. Really try not to overthink this part too much. The beauty of this quilt is that all of the fabrics are meant to be touching and dancing with each other. Have fun!
WEEK 1 WINNER
Congrats Kristi of @ohmydarning!! You have won the first week prize! Please email us at hello@thencamejune.com and we will start curating a 15 piece custom FQ bundle just for you!


 BEFORE WE CUT